This chapter contains the following topics:
Use this selection to enter cost categories for cost items for jobs.
For examples of cost category usage, refer to the Cost Types, Categories, and Items section in the Understanding Job Cost chapter.
If you chose in Control information to use a master set of cost categories, you must enter all of your cost categories here before you start to enter your jobs.
If you are not using a master set of cost categories, but will be entering unique cost categories on a job-by-job basis, you need not use this selection at all.
You can also print a list of your cost categories.
The advantage of using Cost Categories is that it forces you to use consistent categories, thereby permitting meaningful comparisons between jobs. In addition, you can use the Cost Category Analysis (described in the Reports chapter) to view costs across all jobs.
The advantage of not using Cost Categories is that it lets you define ad-hoc categories specially tailored for each job.
You can enable or disable Cost Categories at will (via Control information). Be aware that this is a protected change.
| • | If your business requires very diverse jobs, you may wish to dispense with Cost Categories altogether. |
| • | If you have just installed Job Cost, you may wish to postpone using Cost Categories until you have developed some experience with categories and have worked out a category structure that suits you. |
Even if you normally make use of Cost Categories, you may override this for an individual job, which happens to require its own category structure.
Your business may involve several different kinds of jobs, each requiring its own category structure. However, there is only one set of Cost Categories per company. How do you get around this?
| • | If each type of job is handled by a separate division of your company, consider using the multi-company feature to define each division as a separate company. |
| • | Otherwise, reserve a separate range of category numbers for each application. For instance, if you pave driveways in the summer and plow them in the winter, assign categories 0001-1999 to your paving jobs and 2000-3999 to your snow-plowing jobs. |
You have considerable leeway in how you group your cost categories together so that subtotals of job costs can be shown for cost categories that are related. There are essentially two types of cost category records:
| • | The first is for an actual type of cost—that is, some cost category that describes an exact and specific type of work, overhead, or profit that will go into a job. Most of the cost categories you enter will be of this type. |
| • | The second type of cost category record is a group type and is used purely for laying out your reports so that they will be most useful to you. No costs are ever directly applied to these group cost categories. They do have costs, but these are computed by totaling the regular cost categories, as shown in the example below: |
|
1300 |
Light carpentry |
(group category) |
|
|
1301 |
Light carpentry-labor |
(regular cost category) |
|
|
1305 |
2 X 4’s |
(regular cost category) |
|
|
1306 |
Other lumber |
(regular cost category) |
|
|
1308 |
Hardware (nails, etc.) |
(regular cost category) |
The first cost category (1300) would be designated as a group category when it was entered. The next four cost categories here would actually be parts of one or more jobs, and costs would be accumulated for them once they were put into a job.
When a report is printed that shows costs for the four regular cost categories, the total of these four would be printed under category 1300. Several reports allow you to print the group total amounts without having to print the individual cost categories that go into the groups.
The word category refers to the first type. The second type is always called group category.
Unless stated otherwise, these rules apply regardless of whether you use Cost Categories.
Rule 1
Grouping is optional.
Rule 2
Even if you don’t use Cost Categories (at all, or for a particular job), you may still group cost categories. However, you will have to enter the groups individually for each job (just as you enter the categories individually). You will be shown how to do so in the Jobs chapter.
Rule 3
You can define successively more inclusive levels of groups, thus creating a hierarchy. Sub-totals will automatically be accumulated for the lower-level groups, and rolled to the higher-level totals when a control break occurs in the report. You need not enter the level number, as the software determines it automatically. You can have as many as six levels.
Rule 4
The categories within a group do not all have to be of the same cost type.
Rule 5
The system identifies a group by its beginning category number. If you follow Passport recommendations, the range of a group will be bracketed by trailing zeroes and nines (for instance, 50000 through 59999 might be a very inclusive group, 61200 through 61299 a less inclusive one). Be aware that the system is actually recognizing the range of the group by your defined ending category number. Thus 36789 through 414232 is a valid group, though not a recommended one.
| • | No group category can have the same number as another category or group category. However, two group categories at different levels can have the same ending category. |
| • | The ending category must be at least one higher than the beginning category. |
Rule 6
It is not necessary to define a group to encompass all cost items, simply in order to obtain a grand total. That always prints automatically.
Rule 7
You can organize your categories into groups either before or after you have defined the categories themselves.
Rule 8
Using categories is not an all-or-nothing proposition. Some categories can be organized into groups and some not, if that is what you want.
Rule 9
You can add, change, or delete categories and group categories with no fear of adverse effects on existing jobs.
| • | A job “learns” about a category when you create the cost item (via Cost items for jobs). If you subsequently change or delete that category (using this selection), or even if you discontinue using Cost Categories altogether, the existing cost items “remember” the information in effect at the time they were created. However, subsequent change orders for those jobs make use of the current category definitions. Also, PTD information naturally stops being accumulated on deleted categories. |
| • | A job “relearns” its category groups each time a report is printed. If you reorganize your categories, the historical information printed will retroactively reflect the new organization. |
Rule 10
There are two ways of defining groups inconsistently.
| • | Overlapping groups at the same level |
| • | More than six levels. |
Detecting these errors depends on whether or not they occur in Cost Categories:
| • | Errors in Cost Categories will result in appropriate error messages on the Cost Category List—not on the Categories \ Enter screen. For this reason, always print this list after making significant changes to the category groups. |
| • | For a job that has its own cost categories, these errors are not diagnosed and will cause unpredictable results in various reports. |
It is also possible to define a group containing no categories. This has no effect and is not treated as an error. The empty group simply does not print on the reports.
Before you can enter categories, follow the instructions below to access the J/C menu.
Select
Categories from the J/C menu.
This selection lets you enter new categories and category groups, and change or delete existing ones.
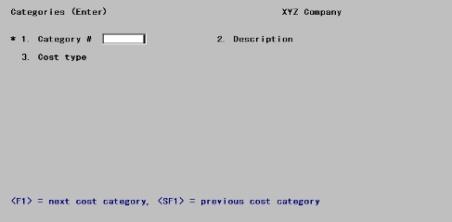
The layout of the screen differs depending on several factors, and will change as you make your entries. When first seen it looks like this:
From this screen you can work with both new and existing cost categories. If a category has already been entered for the number you specify, that category will appear and be available for change or deletion (the cursor will be positioned at Field number to change ?.
Enter the following information:
1. Category #
For a category, this field is any number you assign to identify the category. For a group, it is interpreted as the beginning category number of the group (the ending category will be entered later).
For a new entry
Enter the number of the cost category or group.
For an existing entry
Options
Enter the number of the cost category, or use one of the options:
|
<F1> |
For the next entry |
|
<SF1> |
For the previous entry |
|
Format |
9999999 |
|
Example |
Type 51203 |
2. Description
Enter the description of the cost category or group. This field is required.
|
Format |
25 letters |
|
Example |
Type Structural steel-sub |
3. Cost type
Options
Enter the cost type of the cost category. The valid choices are shown at the bottom of the screen. Once you have entered your choice, its abbreviation will automatically be displayed next to it. There are four predefined cost types:
|
1 |
LABOR |
|
2 |
MATERIALS |
|
3 |
SUBCONTRACT |
|
9 |
PROFIT |
If you added any other Cost Types in Job Cost Control information, they will also show here. You can use Control information to define a total of five cost types (numbers 4, 5, 6, 7, and 8) in any way you wish.
Cost type 1, Labor, is predefined, but Labor burden is not. If you are interfaced to PR, you will require both cost types.
If you are defining a cost category group, enter 91.
Passport recommends that the last digit of each cost category be the same as the number of the cost type for that category—simply to aid the memory. In this example, category 51203 is cost type 3. This convention has the added advantage that 0, the only digit, which can not be assigned to a cost item, is reserved for groups.
|
Format |
99 |
|
Example |
Type 3 |
Upon entering a cost type of 9 or less, its name will display next to it and the remainder of the screen will appear in the format appropriate for that type.
Ending group #
This field only displays if you are entering a group category (cost type = 91). Refer to the How to Group Your Cost Categories section.
Enter the ending category of the group whose beginning is defined by Field #1. Ending category must not be less than beginning category.
Options
If the beginning group number ends in one or more zeroes, you may also use the option:
|
<F2> |
To replace the trailing zeroes of the beginning group number (up to three of them) by nines, and to use the result as the ending group number. |
Organizing your categories in tens, hundreds, or thousands in this way is good practice and makes the groups easier to remember.
|
Format |
9999999 |
|
Example |
[This field does not appear in this example because this is a regular category, not a group.] |
For group entries, this terminates the screen and the cursor is positioned at Field number to change ?. You can no longer change the cost type, but you can change the description or the ending category. For a new entry (but not an existing one), you can also change the beginning category.
4. Unit
This is the unit of work or of material for this cost category. For a labor cost category, it should never be hours (which is always included elsewhere for a labor type cost category). It could be something like BDFT (board feet), CUYD (cubic yards excavated), or SQYD (square yards of carpet laid).
|
Format |
4 characters. The default is Blank (which upon entry displays as None). |
|
Example |
Press <Enter> to accept the default. |
|
Note |
If you enter None, you will not be able to enter data in the subsequent Fields #5. They will be left blank. |
5. Default rate
This is the dollar rate per the unit entered above. For example, the rate per square yard of carpet laid, or the cost per cubic yard of dirt excavated. It is used as the default when entering cost items for a job, and can be overridden or ignored for any specific cost item.
If there is no unit for this cost category, you will not be asked to enter a rate.
|
Format |
99,999.999 |
|
Example |
In this example the cursor does not move to this field because you entered Blank in the preceding field. |
6. Default vendor
If this cost category is for a material or service obtained from an independent supplier or subcontractor, this is the vendor number of the most usual supplier from whom you will obtain that material or service. This will become the default vendor when you enter costs for this cost category.
You may leave this blank if you don’t wish to have a default. You should leave this blank if this cost category is not for a material/service from an independent supplier/subcontractor.
If you do enter a vendor number, it need not be the same as any vendor already defined in the A/P Vendors selection.
|
Format |
6 characters |
|
Example |
Type BINGHM |
7. Default ret paybl %
If you specified not to use retainage payable in Control information, this field displays as Not applicable and may not be entered or changed. Otherwise:
| • | If this cost category is for a material or service obtained from an outside vendor or subcontractor, and if it is your policy to retain a percentage of the payment for this type of material or service, enter the most usual retainage percent. |
| • | If not, leave the field blank. |
This entry will be used as the default retainage percentage when entering costs for this cost category (subject to your override in each case).
|
Format |
99.9 |
|
Example |
Type 10 |
The remainder of the screen consists of historical information, automatically accumulated as costs are processed and rolled into Cost last period and Cost this year buckets when you run Close a period. In add mode, these fields are usually zero-filled (using the <F2> option). In change mode, only protected change is allowed.
8. Cost this period,
9. Cost last period, and
10. Cost this year
Enter historical cost information about this category.
Options
From Field #8 (only), you may also use the option:
|
<F2> |
Zero-fill the remainder of the screen. |
|
Format |
999,999,999.99 (for Fields #8 and 9) 99,999,999,999.99 (for Field #10) |
|
Example |
Press <F2> to default to 0.00 for Fields #8-13 (or fields #8-16 if this had been a labor cost item). |
11. Units this period,
12. Units last period, and
13. Units this year
If some type of unit is also associated with this cost category, such as CUYD, etc. (refer to Unit above), the quantity of these units is also accumulated (along with costs) when costs are processed. Refer to the Note preceding Field #8.
If there is no unit for this cost category, these fields will be zero.
|
Format |
99,999,999.9 (for Fields #11 and 12) 999,999,999.9 (for Field #13) |
|
Example |
These fields were set to 0.00 from Field #8. |
14. Hrs this period,
15. Hrs last period, and
16. Hrs this year
If this is a labor type cost category (and only in this case), the hours worked will also be accumulated as costs are processed. Remember, hours and units are not the same thing.
If this is not a labor type cost category, these fields do not appear.
Refer to the Note preceding Field #8.
|
Format |
9,999,999.99 (for Fields #14 and 15) 99,999,999.99 (for Field #16) |
|
Example |
[Fields do not appear in this example as this is not a labor cost type.] |
Field number to change ?
Options
Make any needed changes. If this is an existing category or group, you may also use one of the options:
|
<F1> |
For the next category or group on file |
|
<SF1> |
For the previous entry |
|
<F3> |
To delete this category or group. |
Upon pressing <Enter> with this field blank, your entry will be accepted and you will be positioned at Field #1 for the next entry.
|
Example |
Use the Cost Category List in the Sample Reports appendix, and enter sample cost categories. |
This selection lets you print your categories and groups. It also diagnoses certain errors, which can be found listed in the How to Set Up Cost Categories in the Getting Started chapter of this documentation.
View a Cost Category List example in the Sample Reports appendix.
Select
Categories from the Reports menu.

Enter the following information:
1. Starting category and
2. Ending category
Enter the range of category numbers to print. Follow the screen instructions.
|
Format |
9999999 for each field |
|
Example |
Press <F2> at each field for First through Last. |
3. Show totals ?
If you answer Y to this question the totals for this period, last period, and this year appear on the list.
Totals are printed only for categories, not for groups.
|
Format |
One letter, either Y or N. The default is N. |
|
Example |
Press <Enter> to accept the default. |
Field number to change ?
Make any needed changes. The Cost Category List has a column labeled Level Number.
| • | This does not correspond to any field on the Enter screen because the level number is automatically determined, based on how you have fitted your group categories together. |
| • | A level number of 1 denotes the most inclusive group category, and so on down to 6 which is the least inclusive. |
| • | If you do not use group categories, every entry has a level of 1. |
| • | If you do use group categories, the level number of the non-group categories will vary depending upon how deeply each one is nested within its group[s]. |